Using a NanoPi NEO Air to Control a Canon Camera
Using gphoto2, you can easily control a camera over a USB tether. My NanoPI has Ubuntu Bionic (18.04 LTS) installed to eMMC, but this should work on most distros that are available for this board. This WILL work on a RaspberryPi as well but the pins for the USB connection are going to be different, but everything else should be the same.
Install gphoto2
First, get gphoto2 installed. You can download from here to get the bleeding edge, but I installed the version found in the sources
apt-get update && apt-get install gphoto2 -y
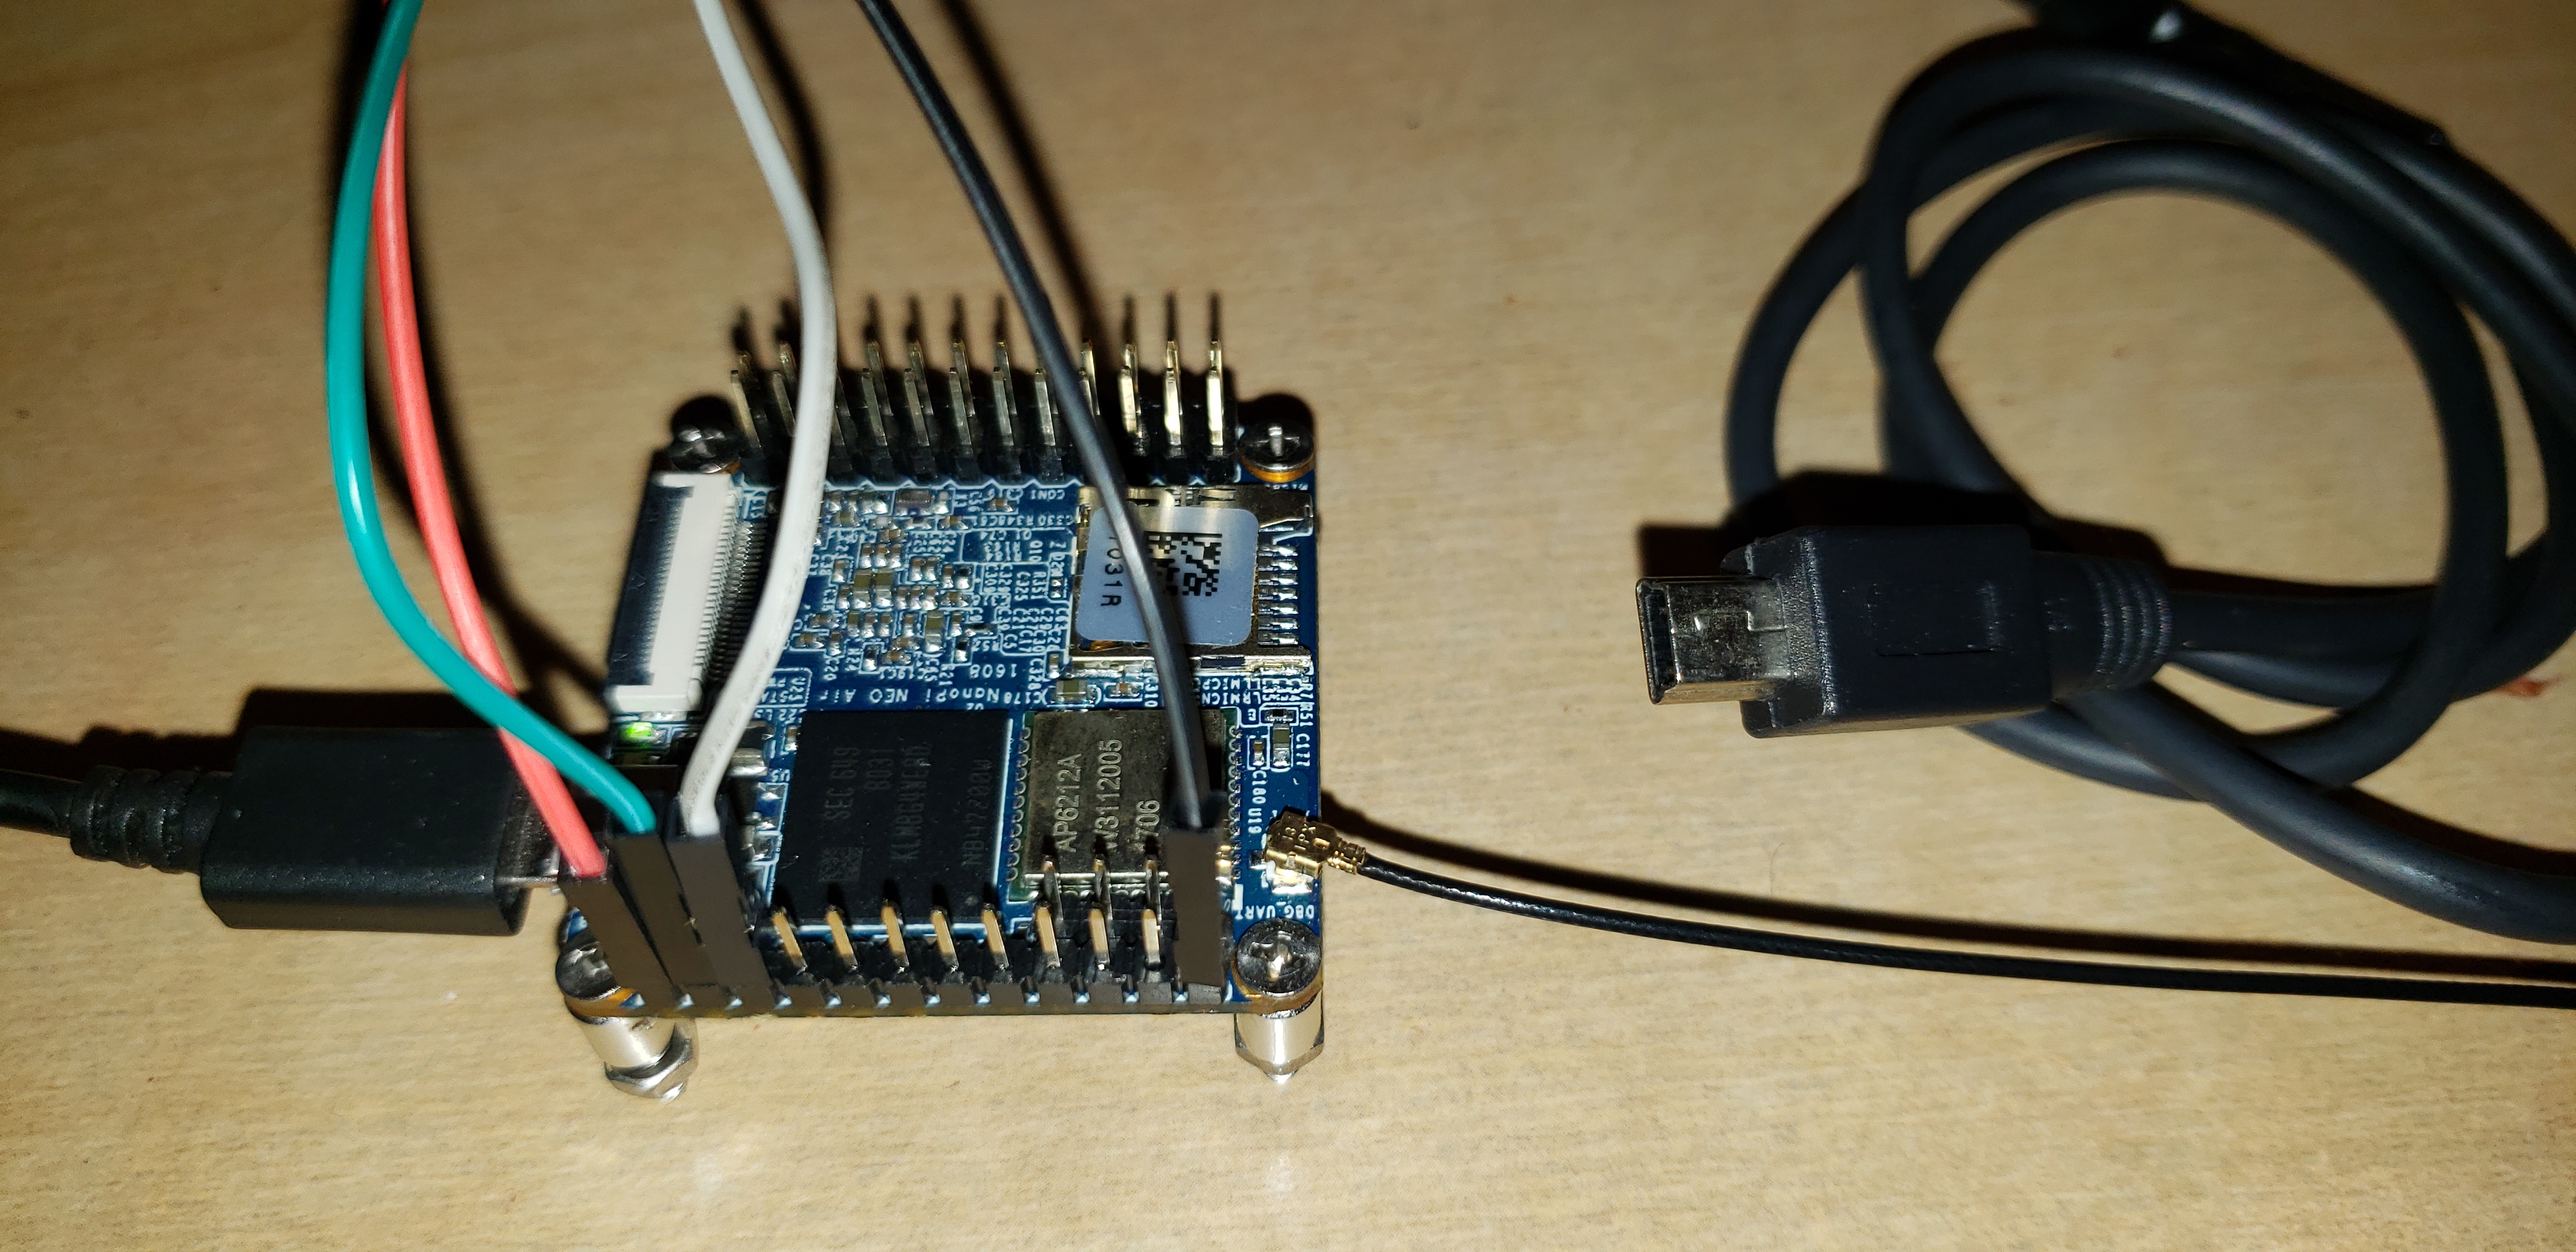
Connect the USB cable to the board
My Canon camera uses a USB Type B mini connector, so I found an old USB Type A –> USB Type B mini cable and used that. I cut off the Type A end and stripped off a few centimeters of the outer plastic sheath. I soddered each of the wires to a jumper cable that made it easier to plug into the board, but it’s totally up to you how you want to make the connection.
Now connect the 4 wires to the following ports:
BLACK: GND
RED: 5V OUT
GREEN: D+ USB2
WHITE: D- USB2

Connect the Camera
Now plug the cable into the camera an turn it on.
Check to see that the board sees the USB connection, we are looking for the Universal Serial Bus line to be in the list
root@nanopiair:~# gphoto2 --list-ports
Devices found: 11
Path                             Description
--------------------------------------------------------------
ptpip:                           PTP/IP Connection
serial:/dev/ttyS0                Serial Port 0
serial:/dev/ttyS1                Serial Port 1
serial:/dev/ttyS2                Serial Port 2
serial:/dev/ttyS3                Serial Port 3
serial:/dev/ttyS4                Serial Port 4
serial:/dev/ttyS5                Serial Port 5
serial:/dev/ttyS6                Serial Port 6
serial:/dev/ttyS7                Serial Port 7
serial:                          Serial Port Device
usb:006,002                      Universal Serial Bus
root@nanopiair:~#
Now with the camera connected, get gphoto2 to detect the camera
root@nanopiair:~# gphoto2 --auto-detect
Model                          Port
----------------------------------------------------------
Canon EOS 600D                 usb:006,002
root@nanopiair:~#
This is great, the NanoPI can see the camera as Canon EOS 600D. I have a T3i, but gphoto2 sees the model as 600D. If you want to see what the model is set on the camera itself, use gphoto2 to read the settings off the camera:
root@nanopiair:~# gphoto2 --summary
Camera summary:
Manufacturer: Canon Inc.
Model: Canon EOS REBEL T3i
  Version: 3-1.0.2
  Serial Number: f42a3cf5e02444b
Vendor Extension ID: 0xb (2.0)

Capture Formats: JPEG
Display Formats: Association/Directory, Script, DPOF, MS AVI, MS Wave, JPEG, CRW, Unknown(b103), Unknown(bf02), Defined Type, Unknown(b104), Unknown(b105)

Device Capabilities:
        File Download, File Deletion, File Upload
        No Image Capture, No Open Capture, Canon EOS Capture, Canon EOS Capture 2

Storage Devices Summary:
store_00020001:
        StorageDescription: SD
        VolumeLabel: None
        Storage Type: Removable RAM (memory card)
        Filesystemtype: Digital Camera Layout (DCIM)
        Access Capability: Read-Write
        Maximum Capability: 62503518208 (59608 MB)
        Free Space (Bytes): 61105242112 (58274 MB)
        Free Space (Images): -1

Device Property Summary:
Property 0xd402:(read only) (type=0xffff) 'Canon EOS REBEL T3i'
Property 0xd407:(read only) (type=0x6) 1
Property 0xd406:(readwrite) (type=0xffff) 'Unknown Initiator'
Property 0xd303:(read only) (type=0x2) 1
Battery Level(0x5001):(read only) (type=0x2) Enumeration [100,0,75,0,50] value: 100% (100)

root@nanopiair:~#
You can see now that the Model that is on the camera is a T3i. If you are doing anything with MagicLantern, remember:
T3i == 600D
So we can see the camera, but what good is a camera if you aren’t using it? Let’s take a picture.
NOTE: gphoto2 can’t change the selection dial on the camera. Set your dial and photo settings (AF, Exposure, timer…) before hand.
Taking a photo:
root@nanopiair:~# gphoto2 --capture-image
New file is in location /store_00020001/DCIM/100CANON/IMG_5718.CR2 on the camera
New file is in location /store_00020001/DCIM/100CANON/IMG_5718.JPG on the camera
root@nanopiair:~#
You can see that 2 files were created when capturing an image. This is because I have set my camera to save the RAW (cr2) file and the Compressed JPG. The photo was taken and saved to the default file location which is the SD card on the camera. What if we want to get the file now?
root@nanopiair:~# gphoto2 --list-files
There is no file in folder '/'.
There is no file in folder '/store_00020001'.
There is no file in folder '/store_00020001/DCIM'.
There are 2 files in folder '/store_00020001/DCIM/100CANON'.
#1    IMG_5718.CR2               rd 23041 KB image/x-canon-cr2
#2    IMG_5718.JPG               rd  5398 KB image/jpeg
There is no file in folder '/store_00020001/MISC'.
root@nanopiair:~#
We can see the photos on the SD card, now let’s download the file to the NanoPI. To get a single file, you need to reference the file number, if we want to get IMG_5718.JPG, we need to know that that is file #2
root@nanopiair:~# gphoto2 --get-file=2
Saving file as IMG_5718.JPG
root@nanopiair:~# ls -l
total 5400
-rw-r--r-- 1 root root 5526711 May  12 13:02 IMG_5718.JPG
root@nanopiair:~#
We can see that the file was downloaded from the camera. If you want to get all the images from the SD card, use gphoto2 --get-all-files
If you are looking to just capture an image and download it right away the following will do just that:
root@nanopiair:~# gphoto2 --capture-image-and-download
New file is in location /store_00020001/DCIM/100CANON/IMG_5719.CR2 on the camera
Saving file as IMG_5719.CR2
Deleting file /store_00020001/DCIM/100CANON/IMG_5719.CR2 on the camera
New file is in location /store_00020001/DCIM/100CANON/IMG_5719.JPG on the camera
Saving file as IMG_5719.JPG
Deleting file /store_00020001/DCIM/100CANON/IMG_5719.JPG on the camera
root@nanopiair:~# ls -l
total 33284
-rw-r--r-- 1 root root  5526711 Oct  6 13:02 IMG_5718.JPG
-rw-r--r-- 1 root root 23426608 Oct  6  2020 IMG_5719.CR2
-rw-r--r-- 1 root root  5122387 Oct  6 13:17 IMG_5719.JPG
root@nanopiair:~#
You can see it captures the image to the camera’s SD card and then downloads to the board. It also removes the file from the camera’s SD card.
This is the basics of using gphoto2. There are many resources for gphoto2 scripts to do some really cool time lapse movies and other useful stuff..